Dublin Kitchens

Kitchen Worktop Installation Explained: Joints, Overhangs & What to Expect

Worktops get a lot of attention when it comes to choosing a colour or material, and almost none when it comes to how they’re actually fitted — which is a shame, because the installation is where a worktop either looks seamless for the next fifteen years or starts lifting at the joint within six months.
Here’s what actually happens when a worktop is templated and fitted, what the different joint types mean for how visible they’ll be, and what’s worth checking before you sign off on the finished job.
Table of Contents
- 1. Why Worktops Are Templated, Not Just Measured
- 2. What Happens Between Template and Fit
- 3. Worktop Joints Explained
- 4. Overhangs and Support Brackets
- 5. Fitting Day: What Actually Happens
- 6. Edge Profiles and Upstands
- 7. What to Check Before You Sign Off
- 8. Mistakes That Cause Problems Later
- FAQ
1. Why Worktops Are Templated, Not Just Measured
A tape measure is fine for a rough budget estimate, but a proper worktop installation starts with templating — using a digital template tool or physical template strips to capture the exact shape of your cabinet run, including any out-of-square corners or wall irregularities. This happens after the cabinets are installed and levelled, not before, because the template needs to reflect the real world, not the drawing.
2. What Happens Between Template and Fit
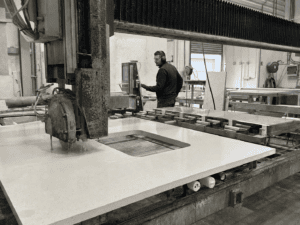
Once the template is taken, the worktop is cut and finished off-site — for laminate worktops this might take a few days, while solid surface or stone-effect materials typically take longer, often 5–10 working days, since they’re cut, edged and polished to the exact template. This is the gap that catches people out if they’ve assumed the whole kitchen finishes in one continuous run of days — see our guide on what to expect from kitchen installation for how this fits into the overall project timeline.
3. Worktop Joints Explained
Almost every kitchen run over about 3 metres needs at least one joint, since standard worktop lengths are limited. How visible that joint is depends on the joint type and the skill of the fitter.
| Joint Type | Where It’s Used | Visibility |
|---|---|---|
| Mitre joint (45°) | Corner joins, e.g. where two runs meet at an L-shape | Least visible when cut and fitted well; the standard for corners |
| Butt joint | Straight-line joins along a long run | More visible than a mitre unless colour-matched jointing strip or seamless bonding is used |
| Postformed joint | Laminate worktops with rounded front edges | Uses a jointing strip; visibility depends on colour match |
For solid surface materials, a well-executed joint can be bonded and polished to be almost invisible. For laminate, a colour-matched jointing strip is the realistic standard — expecting zero visibility on a laminate joint is usually setting yourself up for disappointment.
4. Overhangs and Support Brackets
Any worktop overhang beyond about 300mm — most commonly on a breakfast bar or island seating area — needs support brackets fitted underneath. Without them, the unsupported worktop can flex or even crack over time, particularly with solid surface or stone-effect materials which are heavier and less flexible than laminate. This needs to be planned at design stage, not decided on fitting day, since the cabinet carcass sometimes needs reinforcement to take the bracket fixings.
5. Fitting Day: What Actually Happens
- Delivery and check: the fabricated worktop is delivered and checked against the template before it’s brought into the kitchen.
- Dry fit: the pieces are positioned without adhesive first, to confirm everything lines up before anything is fixed permanently.
- Cutting for sink and hob: if this wasn’t done during fabrication, cut-outs for the sink and hob are finished on-site and edges sealed.
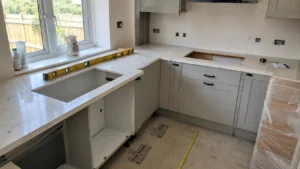
- Jointing and fixing: joints are glued, clamped and polished (solid surface) or fitted with a jointing strip (laminate), and the worktop is screwed down to the cabinet carcass from beneath.
- Sealing: a continuous silicone seal is run along the join between the worktop and the wall or upstand, and around the sink, to keep water out.
6. Edge Profiles and Upstands
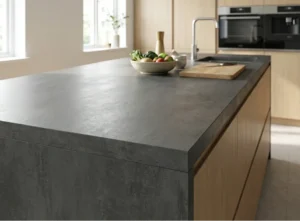
The edge profile — square, bullnose, or a rounded “pencil” edge — is largely down to style preference, but it’s worth deciding early since it affects how the worktop is cut and finished. An upstand (a short strip of matching material running up the wall behind the worktop) is a practical, lower-cost alternative to full tiling and gives a clean, continuous look, particularly popular in laminate kitchens.
“A worktop joint isn’t something to hide and hope for the best — it’s something a good fitter plans the position of, ideally away from the sink and away from where you’ll actually be chopping.” — Kitchens4U installation team
7. What to Check Before You Sign Off
- Run your hand along any joint — it should be flush, with no noticeable ridge
- Check the worktop is level using a spirit level, particularly either side of any joint
- Confirm the silicone seal is continuous with no gaps, especially around the sink
- Check any overhang doesn’t flex noticeably when you press down on it
- Confirm cut-outs for the hob and sink are clean, with no chipping at the edges
8. Mistakes That Cause Problems Later
- Templating before cabinets are fully levelled — any movement in the carcass after templating throws off the fit.
- Skipping support brackets on overhangs to save a small amount of time or cost — this is the single most common cause of a cracked worktop down the line.
- Poor silicone sealing around the sink — water ingress here is one of the most common causes of worktop damage over time, particularly around chipboard-core laminate worktops.
- Rushing the joint position without discussing it with the homeowner first — a joint placed right where you naturally chop vegetables is a daily annoyance that’s entirely avoidable with early planning.
FAQ
How long does it take to fit a kitchen worktop?
Fitting day itself typically takes a few hours to a full day depending on the size and number of joints, though the templating and fabrication process before fitting day usually adds 5–10 working days for solid surface or stone-effect materials.
Why do worktops need to be templated instead of just measured?
Templating captures the exact real-world shape of your cabinets, including any wall or corner irregularities, which a standard measurement can miss.
Will the worktop joint be visible?
A well-executed mitre joint on solid surface materials can be almost invisible once polished. On laminate worktops, a colour-matched jointing strip is the realistic standard rather than a completely invisible seam.
Do I need support brackets under my worktop?
Yes, for any overhang beyond roughly 300mm, such as a breakfast bar. Without support, the worktop can flex or crack over time.
Can a joint be avoided completely?
On longer runs, usually not, since standard worktop lengths are limited. A good fitter will plan the joint position away from high-use areas like the sink or main chopping zone.
Is silicone sealing really necessary around the sink?
Yes. Poor or missing sealing around the sink is one of the most common causes of worktop water damage over time, particularly on laminate worktops.
What’s the difference between a mitre joint and a butt joint?
A mitre joint is a 45-degree angled join typically used at corners and is generally less visible. A butt joint runs straight across and is more common on long straight runs.
What is an upstand and do I need one?
An upstand is a strip of matching worktop material running up the wall behind the worktop, offering a clean look and water protection as a lower-cost alternative to full tiling.
Can I fit a worktop myself?
Templating, jointing and sealing all require specific tools and experience to get right — a poorly fitted worktop is difficult and expensive to correct later, so professional installation is strongly recommended, particularly for solid surface materials.
Related Articles
- Kitchen Worktop Materials in Ireland — The Complete Comparison Guide
- How Much Do Kitchen Worktops Cost in Ireland?
- Kitchen Islands for Irish Homes: Sizes, Layouts & Worktop Options
- Kitchen Installation in Dublin: What Actually Happens, Start to Finish
Ready to Talk Worktops?
If you’re planning a new worktop and want to understand exactly how it’ll be fitted in your kitchen, book a free consultation with our design team, or browse our full range of kitchen worktops to see the material and edge options available.
A good worktop installation is quiet, precise, and unremarkable — which is exactly what you want from the surface you’ll use every single day for the next decade.