Dublin Kitchens

Kitchen Plinths, Cornices and Pelmets Explained
Kitchen plans devote plenty of attention to doors, worktops and appliances. Plinths, cornices and pelmets are often reduced to a few lines near the bottom of the order, even though they determine whether the cabinets look properly finished when the kitchen is installed.
These pieces are not interchangeable. A plinth closes the gap below base units. A cornice finishes the top of wall or tall cabinets. A pelmet sits below wall cabinets and can conceal lighting. Depending on the kitchen style, you may need all three, only a plinth, or a more restrained combination.
Understanding the difference is particularly important when ordering a flat-pack kitchen, replacing kitchen doors or comparing quotes. If the finishing pieces are missing, the cabinet order can be technically complete but the fitted kitchen will not look complete.
The Difference at a Glance
| Finishing piece | Where it goes | What it does |
|---|---|---|
| Plinth | Below base and tall units | Covers cabinet legs and the service space beneath the units |
| Cornice | Along the top of wall and tall units | Finishes the upper edge and can add a traditional or furniture-style detail |
| Pelmet | Along the underside of wall units | Finishes the lower edge and may conceal under-cabinet lighting |
End panels, fillers and light rails are different again: they cover visible cabinet sides, close gaps at walls or conceal lighting. Names vary between manufacturers, so check the product drawing rather than relying on the name alone.
What Is a Kitchen Plinth?
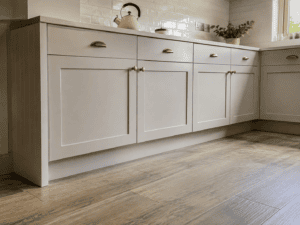
A kitchen plinth—sometimes called a kickboard or toe kick—is the vertical board fitted below base cabinets. Cabinet boxes do not normally sit directly on the floor. They stand on adjustable legs, which allow the installer to level the cabinets even when the floor is uneven. The plinth clips to those legs and hides the gap.
That gap provides space for levelling, allows some services to pass beneath the units and helps set the worktop at a comfortable finished height. Recessing the plinth also gives your feet somewhere to go when standing at the worktop. The board then keeps everyday debris out and creates a continuous line across the cabinet run.
Kitchens4U’s Plain Plinth (Edged) is 18mm thick, 150mm high and supplied in 2400mm lengths. That is a common format, but it should not be treated as a universal kitchen measurement. Cabinet leg height, floor finish and worktop thickness all influence the final plinth requirement. Check the specification for the cabinet system you are actually ordering.
Plain or profiled plinth?
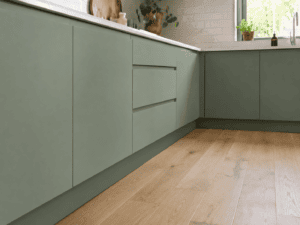
A plain plinth has a straight face and works naturally with slab, handleless and simple Shaker kitchens. It creates a quiet base line without competing with the doors.
A profiled option such as a Torus Plinth has more traditional detailing. It can suit a painted or five-piece kitchen where the aim is to make the cabinetry feel closer to fitted furniture. The choice is largely visual, but the profile must still work around corners, end panels and appliance openings.
Should the plinth match the doors?
Usually, yes. Matching the plinth to the cabinet doors or visible end panels gives the kitchen a settled, continuous appearance. A contrasting plinth can work—black or dark graphite beneath pale cabinets, for example—but it creates a deliberate shadow line and should be part of the design rather than an accidental mismatch.
Matching by a colour name alone is risky. “Light grey”, “cashmere” or “white” can differ between ranges, and gloss, matt and woodgrain surfaces reflect light differently. Order the plinth from the same door range wherever possible, particularly with painted and woodgrain finishes.
What Is a Kitchen Cornice?
A cornice is fitted along the top edge of wall cabinets and, in some designs, tall cabinets. It closes the visual gap above the doors and gives the upper line of the kitchen a more considered finish.
Cornices are common in Shaker, painted timber and traditional kitchens. A small, clean profile can also work in a transitional design, but large decorative mouldings tend to look out of place on flat slab or handleless doors.
Whether a cornice is needed depends on how the cabinets meet the room. If wall units finish well below the ceiling, it can give the top edge more presence. Where cabinets sit close to an uneven ceiling, a flat infill or scribed panel is often more practical. A cornice across tall housings can create a built-in furniture effect, but only if it returns neatly and clears the ceiling.
What Is a Kitchen Pelmet?
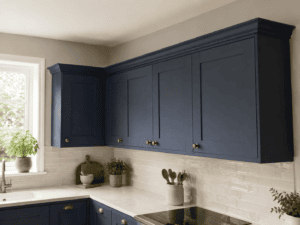
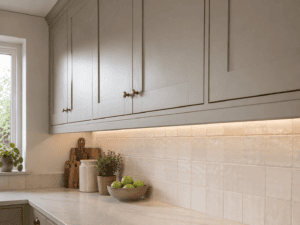
A pelmet is fitted beneath wall cabinets. Its main job is to finish the underside and create a clean lower edge, though it can also conceal LED strips, wiring or the underside of a cabinet.
Kitchens4U’s Tangent Pelmet is an 18mm-thick, 57mm-high profile supplied in 3050mm lengths. Its angled shape suits modern and transitional Shaker kitchens and gives enough depth to screen under-cabinet lighting from normal standing height.
The height matters. Wall cabinets must leave comfortable clearance above the worktop, kettle and small appliances. A deep pelmet reduces that gap and can make a compact kitchen feel boxed in.
Modern kitchens often use a shallow light rail instead of a traditional pelmet, or recess the LED strip into the cabinet underside so no trim is visible. That produces a cleaner line, but the lighting position needs to be planned before installation. An exposed LED strip fitted as an afterthought is difficult to hide neatly without adding a pelmet later.
Do Modern Kitchens Still Need Cornices and Pelmets?
A plinth is still required for most kitchens built on adjustable legs. Cornices and pelmets are optional design elements.
For a handleless or minimal slab kitchen, leaving off the cornice and pelmet usually gives the cleanest result. The cabinet tops and undersides must then be properly finished, and lighting channels should be integrated rather than simply fixed to the surface.
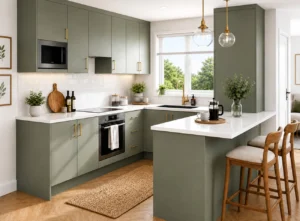
For a Shaker kitchen, restrained profiles can help the doors and end panels read as one furniture-style composition. In a period home with a tall ceiling, cornice may connect wall units and tall housings; in a low-ceilinged apartment, the same detail can feel crowded. There is no rule that every kitchen must use every matching trim.
Edged, Vinyl and Painted Finishes
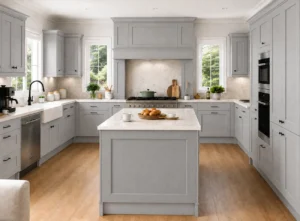
Finishing pieces need to match the door range in both colour and construction.
Edged MFC or MDF is practical for slab and contemporary kitchens. The colour and quality of the edging matter because the top edge of a plinth can be visible at close range.
Vinyl-wrapped profiles coordinate with vinyl doors and allow shaped details. Seal exposed cut edges, particularly near a sink or dishwasher.
Painted MDF or timber suits painted Shaker kitchens but is vulnerable to visible chips. Use a sharp blade, protect the face and touch up exposed cuts with the recommended matching product.
Do not assume that a painted plinth and an edged plinth in the same named colour will look identical. The surface texture and sheen can change how the colour appears. Compare physical samples in the same light as the kitchen whenever possible.
How to Measure Plinths Correctly
Plinth is ordered by length, but measuring only the front of each cabinet run can leave you short.
Include:
- Every visible straight run beneath base and tall units
- Returns at exposed cabinet ends
- Sections around islands and peninsulas
- Internal and external corners
- Additional material for cuts and unavoidable offcuts
An island needs plinth on every visible side unless one edge is designed differently. A peninsula may need a return around its exposed end. Directional or shaped profiles also limit how offcuts can be reused.
Measure after the finished floor level is confirmed. New tile, timber or vinyl can alter the gap below the doors and the amount trimmed from the plinth. Flooring beneath the cabinets also creates a different leg setting from flooring that stops at the units.
The plinth must also clear appliance doors. Integrated dishwashers are the usual trouble spot: the door swings down close to the plinth, and some systems need a specific recess, notch or sliding-door arrangement. Check the appliance installation drawing before cutting the plinth.
Measuring Cornice and Pelmet
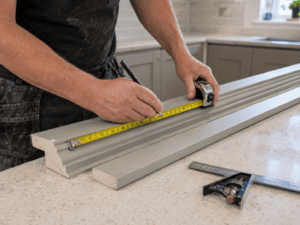
For cornice and pelmet, measure each wall-cabinet run and add all visible returns, mitres and cutting waste. A 600mm end unit needs more than 600mm of profile if the trim returns along its exposed side. Ordering only the measured front length is a common reason installations are left waiting for an extra piece.
Before ordering, confirm:
- Whether the profile is supplied in fixed lengths
- Which face is intended to be visible
- Whether the same profile is reversible as cornice or pelmet
- How far it projects beyond the cabinet
- Whether it will conflict with doors, ceilings, extractors or adjacent tall units
- Whether matching corner blocks or quadrants are available
Installation Details That Make a Difference
Plinth is usually clipped to the cabinet legs. This keeps the face free from screw holes and allows access to services. Do not permanently seal every section to the floor; future access should still be considered.
Cut edges are the vulnerable points. Seal them before fitting, especially beside sinks, dishwashers and external doors where wet footwear may be nearby. On an uneven floor, the bottom edge may need to be scribed so the top remains level and the gap is consistent.
Cornice and pelmet should be fixed from the cabinet side or with the recommended brackets, not through the visible face. Position joints where they are least noticeable and test under-cabinet lighting before the pelmet is finally fixed.
If you are fitting the kitchen yourself, the order of work matters. Level and secure the cabinets first, hang and align the doors, complete panels and fillers, then measure the finishing profiles against the installed units. Our flat-pack kitchen planning guide covers the wider checks to make before ordering.
Replacing Doors? Check the Finishing Pieces Too
When kitchen doors are replaced, the old plinths, cornices and pelmets are often left in place to save money. That works only if their colour, condition and profile still suit the new doors.
Ten-year-old cream plinth can look noticeably yellow beside a new white door. An ornate cornice may fight with a new slab front. Water damage along the bottom edge of the old plinth will remain visible even if every cabinet door is new.
Inspect all finishing pieces while measuring the doors. Replacing them at the same time usually produces a more convincing renovation and avoids trying to colour-match discontinued materials later. Our replacement kitchen doors guide explains when a door-only update makes sense and when the existing cabinets need more attention.
Common Ordering Mistakes
The most frequent problems are simple ones:
- Plinth is left off the order because the cabinet price looked complete
- Cornice and pelmet are confused, so the wrong profile or quantity arrives
- Only the front cabinet width is measured, with no allowance for returns or mitres
- A profile is selected from a different door range and does not match in colour or sheen
- The finished floor height is changed after the plinth has been ordered
- Dishwasher-door clearance is not checked
- Cut MDF or MFC edges are left unsealed near water
- No spare length is allowed for a damaged or inaccurate cut
- Lighting is installed after the pelmet position has already been fixed
These are inexpensive components compared with cabinets and worktops, but a missing length can delay completion and leave an otherwise finished kitchen looking temporary.
Choosing the Right Combination
For a modern slab or handleless kitchen, a plain matching plinth with no cornice and either a shallow light rail or recessed lighting is usually enough.
For a simple Shaker kitchen, use a matching plinth and consider a restrained cornice or pelmet where it helps finish visible cabinet runs. You do not have to use both.
For a traditional painted kitchen, matching profiled plinth, cornice and pelmet can create a stronger furniture-style result, provided the room has enough ceiling and worktop clearance to carry the extra detail.
The best decision is made alongside the full cabinet plan, not after the units arrive. If you send Kitchens4U your room measurements, photos or a rough layout, the design team can identify the plinth, panels and trims required for the selected cabinet range. Book a free kitchen design consultation before ordering if you would like the complete kitchen checked as one system.
Frequently Asked Questions
Is a kitchen plinth the same as a kickboard?
Yes. In Ireland and the UK, plinth is the usual kitchen-industry term. Kickboard or toe kick describes the same finishing board beneath base units.
What height is a standard kitchen plinth?
Many cabinet systems use a plinth around 150mm high, but it is not universal. The correct height depends on the cabinet legs, finished floor level, cabinet height and required worktop height. Always check the system specification.
Do I need a cornice and pelmet in a modern kitchen?
Not necessarily. Minimal slab and handleless kitchens often look better without them. A plinth is normally still needed, while under-cabinet lighting can be recessed or hidden behind a shallow light rail.
Can a plinth be removed after the kitchen is fitted?
Yes. Most plinths clip to adjustable cabinet legs and can be removed for access to services or cleaning. Avoid fixing every section permanently unless the installation design specifically requires it.
Should cornice and pelmet match the cabinet doors?
They normally should match the door or visible end-panel finish. Order from the same kitchen range where possible, as identical colour names from different ranges can vary in texture and sheen.